I had to build some small countdown blocks for my advent Hearse so I could countdown 'til Halloween in style, and thought I'd share how I distress paint wood. Admittedly this is pretty small scale but it looks really good on big stuff too. I apologize if this is too simple for some of you crafters. I've seen some of you doing the scrapbook paper thing on wood and it's pretty dang amazing! I think I'd have to turn in my "Man Card" if I start scrap-booking though.
While I was doing these little blocks I thought that it would be cool to make some of those old wooden alphabet blocks out of a 4x4 piece of lumber, and then distress them with some flat dull colors. We don't do any baby zombies though, maybe someone else will do some for their Halloween haunted house. For me, it's all in the little details.
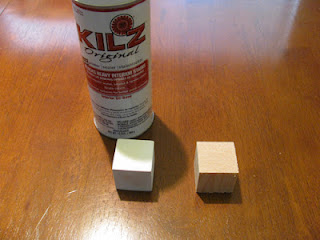
I'm using new unfinished wood and I always like to sand it then prep it with some Kilz wood primer. Very lightly sand the roughness of the Kilz primer if you like.
 |
| Prime wood to seal and it takes less layers of paint to get good coverage |
Next is the important part. Spray your project with flat clear spray lacquer. Two or three coats would be good but one will work in a pinch. This is the layer(s) that helps prevent you from sanding through your base color back into the wood. If you used gloss or semi gloss paint on your base it will dull that sheen down a bit too.
Once that is dry paint your top coat, just one coat is all that is necessary. Too heavy or too many layers and it takes a lot of sanding to get back to your base color. I painted these flat black for my top layer.
 |
| You can see my orange base color peeking through the black coat on the right. That's good though, less sanding required to get the orange to show through. |
 |
| You can see the white primer started to peak through the edges letting me know I sanded to much. I kind of liked it though, so I left it. |
Anyone have a different technique, I'd love to hear it!
Thanks!

like it! looks great!
ReplyDeleteThanks Pensive P.
DeleteOh wow! These are too cute! Me wanteee!
ReplyDeleteThat looks wicked! Great job man!
ReplyDeleteI love how this technique looks Mark! It has a very "authentic" look of age and wear to it. My mind just started buzzing with ideas to use this finish on.
ReplyDeleteI can't wait to see your Advent Hearse!
Oh, they came out beautifully! Great job!!
ReplyDeleteI love how they turned out. Thanks for sharing your tips:)
ReplyDeleteVery cute indeed. :)
ReplyDelete